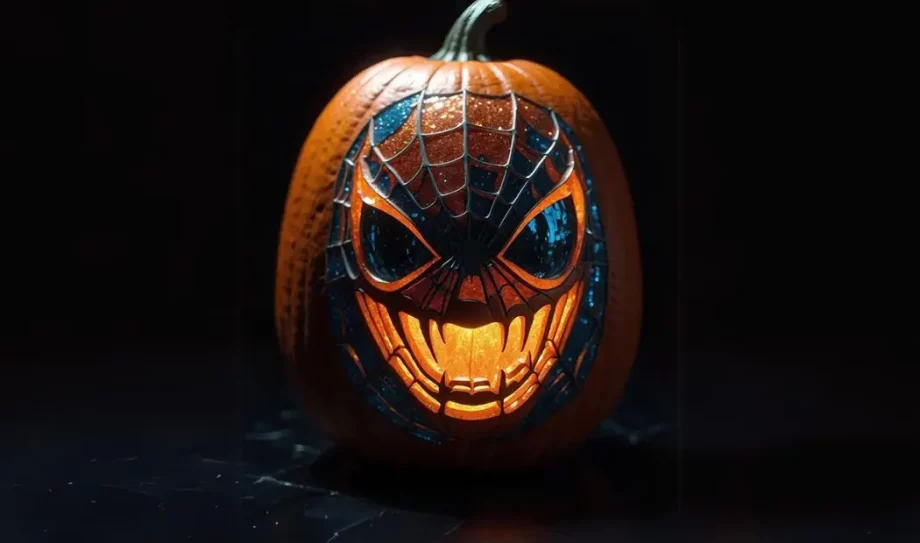
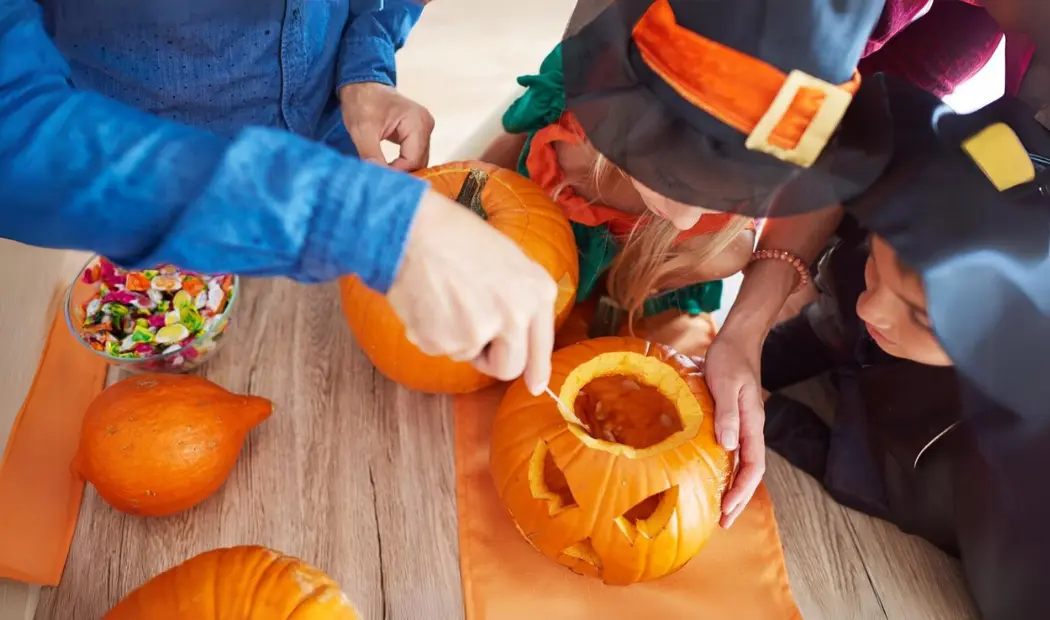
Painting pumpkins is a fun way to celebrate the fall season. Pumpkin painting is an exciting activity that brings families together. When we have to engage kids, what is better than everyone’s favorite, Spiderman? So, add a superhero angle with our Spider man pumpkin paintings?
This blog will shed light on painting Spiderman pumpkin. It offers step-by-step instructions, creative tips, and safety advice to make it a memorable experience for kids of all ages. This guide will take you through fun and easy ways to create spider man pumpkin with your kids. So, let’s swing into action!
Why is Spider Man right for pumpkin painting?
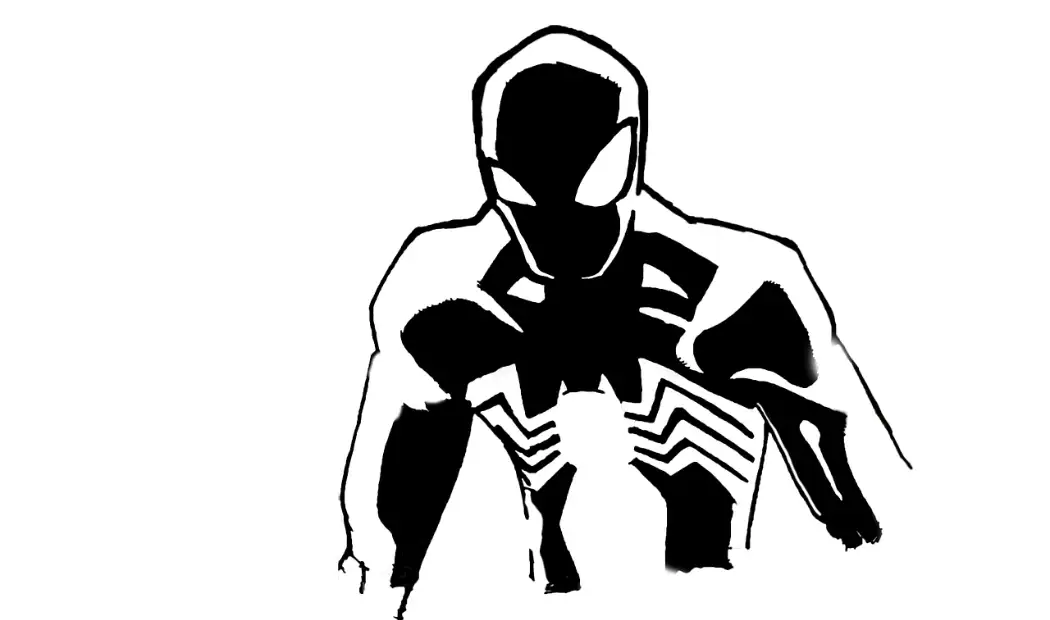
Spider-Man is one of the most famous superheroes we have. He has iconic red eyes and a blue costume. He has web-slinging abilities with the “with great power comes great responsibility” message. This is famous among all his young and old friends. Choosing Spider-Man as the theme for your pumpkin painting could be a unique and exciting experience, without any doubt.
Spider Pumpkins vs. Regular Pumpkins
| Regular Pumpkin | Spider Pumpkin |
| Orange & basic | Bold & heroic |
| Smiley face carvings | Webbed, wicked designs |
| Lasts a few hours | Gets shared on TikTok |
| Cute-ish | Cool AF |
| Meh | Major |
What do you need for Spiderman pumpkin painting for kids?
You should be sure that you have all the necessary supplies. Here’s a checklist so that you can begin.
- Pumpkins: You can choose medium-sized pumpkins with smooth surfaces for the best painting results.
- Paints: You can have red, blue, black, white, and any other colors you might need for your painting.
- Paintbrushes: There are various sizes available, like fine-tipped brushes for detailed work.
- Permanent markers: We will be using black and white markers for outlining and detailing.
- Painter tape: It will be used to help create clean lines and sections.
- Paper towels and water cups: They are used for cleaning brushes and mixing colors.
- Newspapers or plastic sheets: It will be used to protect your work surface.
Optional Materials:
- Paint markers can be used for fine details
- Glitter or glow-in-the-dark paint can be used for extra flair
- Stencils can be used for younger children or those needing a little guidance
- Old clothes can also be used to protect kids’ clothing
3 Types of Spider Pumpkins
| Type | Vibe | Totals Needed |
| Painted Spiderman | Clean, bold, cartoonish | Paint, markers, brushes |
| Carved Creeper | Sharp, spooky, edgy | Carving kit, stencil |
| Combo Chaos | Full send, all-out | Paint + carve everything |
How do I prepare the pumpkin in spider web pumpkin painting?
This step is very essential. It is very essential to prepare your pumpkin properly before you go for your spider man painted pumpkin. This step makes sure that the paint adheres well. Let’s look into this.
- Start with washing the Pumpkin: You can use a cloth or sponge to clean the surface of the pumpkin. Remove any dirt or debris. This helps the paint stick better.
- Dry pumpkin completely: You can let the pumpkin dry completely. A dry surface is crucial for the paint to adhere properly.
- Prime the pumpkin nicely: You may apply a white base coat of paint to the pumpkin. This can make the colors pop. If you choose to do this, let the base coat dry thoroughly.
3D Webbing effect to spider man halloween pumpkin
You need to give your pumpkin a more dynamic look while painting Spiderman pumpkin. You can add a three-dimensional webbing effect using hot glue.
- Draw the web: You can lightly sketch with a pencil where you want the web to go on your pumpkin.
- Apply Hot Glue: Now carefully trace over your pencil lines with hot glue. This will give some time for glue to dry completely.
- Paint the Web: Once the glue is dry, paint over it with black acrylic paint. This will create a striking 3D web effect.
Pumpkin with spider web Combo
Time to level up your spider web pumpkin painting game.
| Combo | Look |
| Web + Carve | Painted Spiderman face, carved web back |
| Paint + Legs | Add pipe cleaner legs for pumpkin spider energy |
| Double Trouble | Two pumpkins: one Spidey, one villain |
Want to try a Venom and Spider-Man split pumpkin painting for kids?
You can also have a challenging design for kids. You can create a Spiderman face pumpkin that has both Spider-Man and his nemesis, Venom.
- Divide the pumpkin: You can try using painter’s tape. Then start by dividing the pumpkin in half vertically.
- Paint Spider-Man Side: Firstly, you can follow the basic Spider-Man mask design for one half of the pumpkin.
- Paint Venom Side: Now you have to start painting the other half black. You can use white paint to create Venom’s large, sharp eyes and grin. You can then add black details for the teeth and tongue.
- Blend both sides: Now remove the painter’s tape and carefully blend the two halves to get the desired look.
Kid-Approved Spidey Tools for spider pumpkin painted
Forget boring supplies. Upgrade for Gen Z creators.
| Tool | Why It’s Cool |
| UV paint | Glows at night |
| Edible markers | For baby-safe decorating |
| Mini ring lights | Light it up like a pro |
What are the basic, easy and fun steps for painting Spiderman pumpkin for kids?
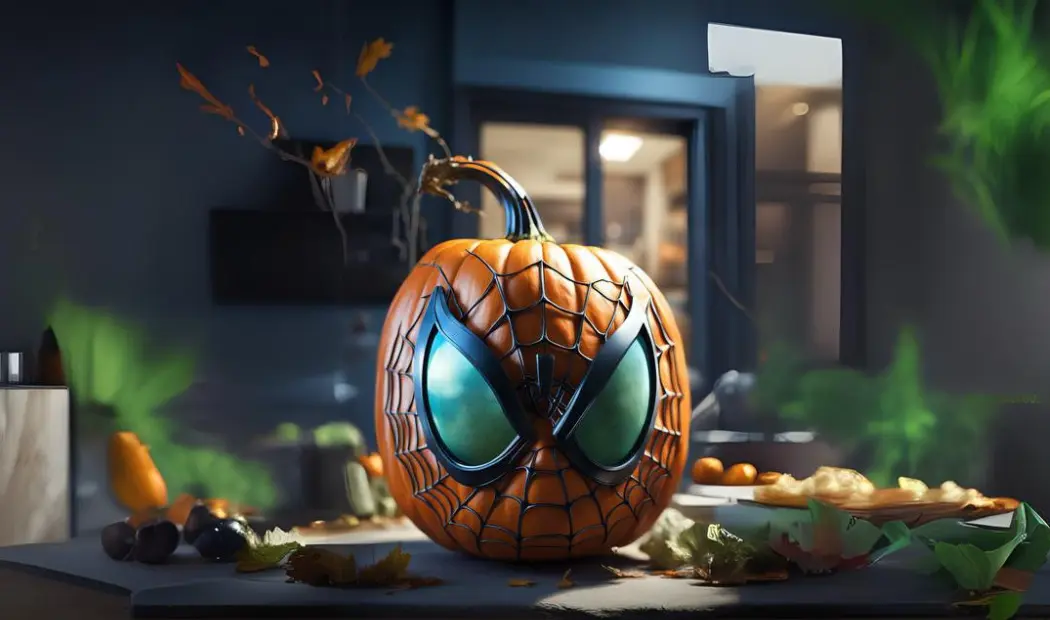
These are the basic steps that, one by one, will guide you in painting Spiderman pumpkin.
- Apply base color: You can paint the entire pumpkin red in the beginning. You can also apply two coats if necessary. Then let each coat dry completely.
- Make the outline of the mask: You can use a black permanent marker or a brush and black paint for this. Then draw the outline of Spider-Man’s mask. The eyes have to be large and almond-shaped.
- Fill in the Details: You should begin painting the eyes white and leave a small black border. You should use black paint to draw the web pattern on the mask. Now draw straight lines from the top of the head to the bottom and from side to side. Then draw curved lines.
- Time to give the final touch: Once the paint is dry, you can go over the lines with a black marker to sharpen the details.
What are the tips helpful for painting Spiderman pumpkins for kids?
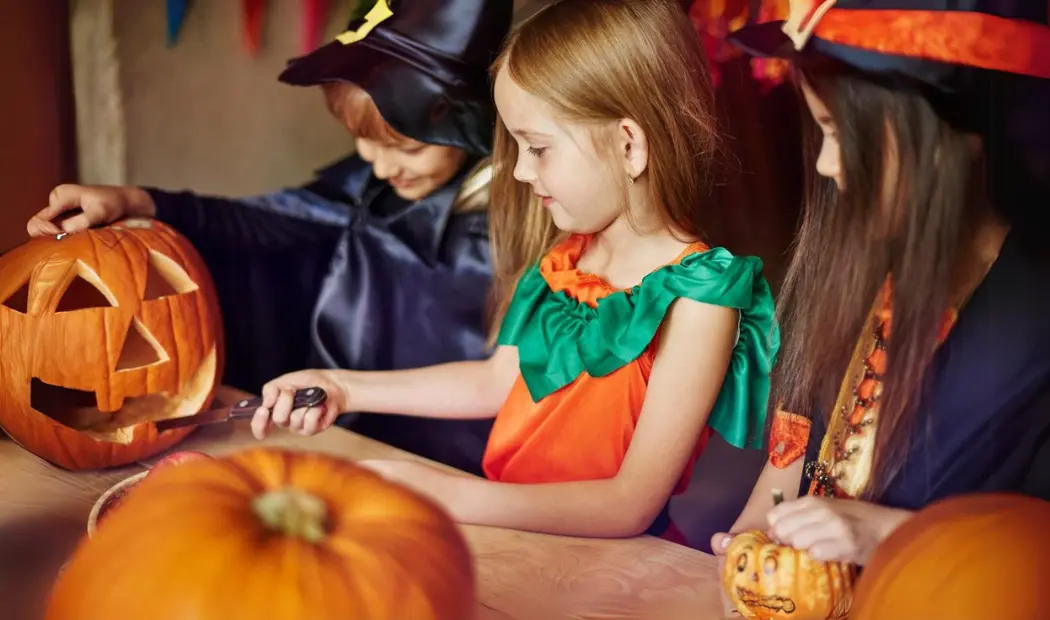
Painting Spiderman pumpkins is a fun activity for kids, but it’s important to keep some points in mind. Let’s check them out.
- Use non-toxic paints: You should always use non-toxic, child-safe paints. Acrylic paints are generally a good choice. Just check the labels for child safety.
- Provide supervision: You should supervise kids at all times when using small or sharp objects like scissors for cutting stencils. It is important that kids use the materials safely.
- Use Clothing and Surfaces: You should cover the work area with a newspaper or a tablecloth. Kids can wear old clothes to protect against spills and stains.
- Encourage and guide them: It is important to guide kids through the process. It allows them to express themselves through Spider-Man pumpkin painting.
- Let them choose: Let kids choose their pumpkin, colors, and design. This will help them increase their enthusiasm and engagement.
- Praise kid’s efforts: It is important to praise their effort rather than the outcome. You have to celebrate their hard work when you do it together.
Clean-Up + Display Tips
After the fun, keep it neat and proud.
How to clean:
- Use baby wipes or a wet rag for paint spills.
- Keep leftover paint in jars for the next project.
- Spray a clear sealer on top.
Where to show off:
- Front porch (Spidey welcome zone)
- Halloween party table
- Inside your kid’s room
Bonus Craft: Make a DIY Pumpkin Spider!
Why stop at painting?
- Get a small pumpkin (or mini pumpkin)
- Paint it black or dark purple
- Add googly eyes
- Attach 8 pipe cleaner legs
- Name your spider. Yes. Name it.
Boom. You just created a spider pumpkin!
Spiderman pumpkin diamond painting
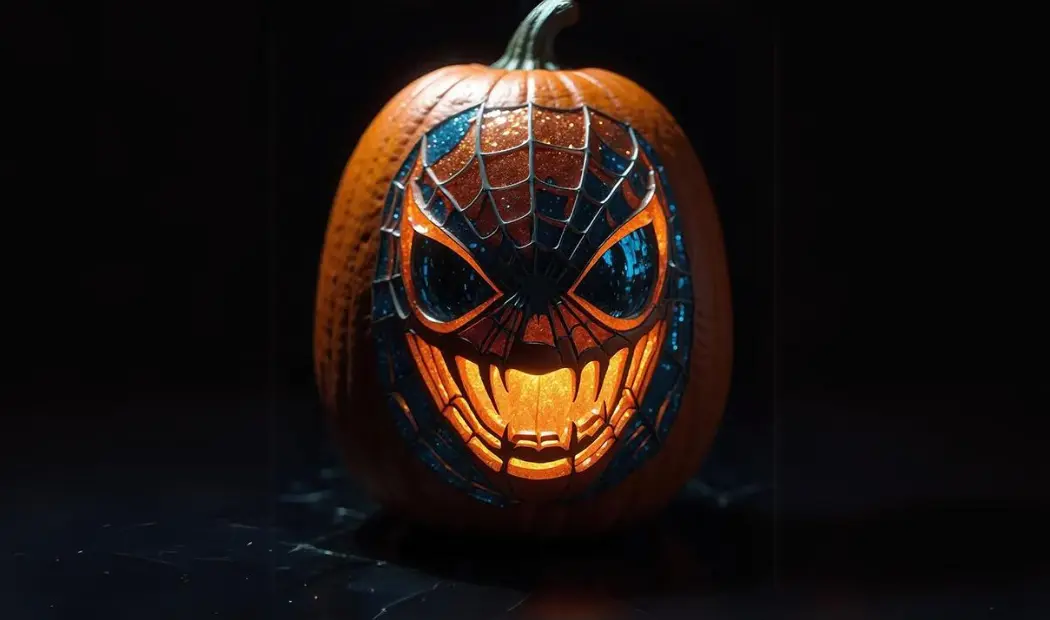
It is one of the most popular ways of painting. You just have to put the colorful diamond bead on the pre-structured surface. This will emerge as the face of the spiderman. There is a blue and orange bead’s glitter on the face that can be put on a pumpkin to get your halloween’s favorite spiderman pumpkin painting. It is available in various dimensions and various options. You can check out this kit which comes with all the things you need to diamond paint.
Summing Up!
Painting Spiderman pumpkins is an enjoyable activity. It allows kids to express themselves while celebrating their love for a favorite superhero. You can stick to the classic mask design or go into more complex creations. There are other options too, like creating paintings of Spiderman pumpkin and cat pumpkin using diamond beads. It is up to you to choose. The most important thing is to have fun and enjoy the process together as a family.
You can have a fun, safe, and memorable experience for children by following the right guide. It is totally alright if you’re a parent, teacher, or simply someone who loves to craft with kids. We have everything you need. So, put on some Spider-Man tunes and begin! Happy painting.
So, are you excited about diamond painting now? Why don’t you check out the Art of Diamond painting!